<-- Stage 2: Team Checking | Stage 4: Consultant Visit -->
Stage 3: Preparing for the Consultant check
Note: This stage is part of stage 2 in the USB plan.
In this third stage of a translation project you will do comprehension testing and back translation. You will also continue with the basic checks and spell checking.
The following modules will help you in this stage:
- 16: BT1 – Draft a Back Translation
- 17: BT2 – Interlinearize a project
- 19: BC3 – Basic checks 3
- 21: PPR: Progress report
16: BT1 – Draft a Back Translation
Introduction
In preparing for a consultant check, the consultant will need one or more versions of your text in a language they understand. This is often called a back-translation. There are two types of back translations. This module explains how to do a free back-translation and keep it up to date. The next module explains how to do a word-for-word back-translation using the project interlinearizer.
Where we are
You have typed, checked and revised your translation in Paratext and are now preparing for a consultant check. Before you can start your Administrator must have created a separate project for your back translation.
Why is this important?
Your text needs to be check by a consultant. But because the consultant does not know your language, you need to translate your text back into a language they can understand. This is where the term “back translation” comes from. The consult will use this translation to help your team improve your exegetical choices in the text.
It is preferable that this is done by someone who hasn’t been involved in your translation. This way she will type what the text says and not what you meant it to say. This should also be done without looking at any helps or other Bibles.
What will you do?
- Open your project and back translation project
- Arrange your text on the screen.
- Draft your back translation
- Mark the status as finished when you complete a chapter.
- Check that your text is up-to-date (or in sync), view any differences by moving to the next change if appropriate.
-
16.1: Create a new project for the back translation
(First time only, by Administrator)
- ≡ Paratext under Paratext > New Project
- Click Edit
- Type a full name for the project and a short name
- Click OK
- Choose the language for your back translation (e.g. English)
- Leave the versification
- For the Type of project choose "Back Translation"
- For Based on choose your project
If necessary, Paratext will change the versification to match your project. - Click the Books tab
- Choose the desired books
- Click OK
- Click the Create Book(s) link
- Create books as needed.
-
16.2: Draft your back translation
- Open your project
- Open your back translation project
- Arrange the windows so that you can easily see both windows.
- Click in the back translation window, (the verse in your project is highlighted).
- Type your back translation into each verse (after the check box).
- Continue for each verse in the chapter.
-
16.3: Mark the chapter as Finished
When you have finished the chapter
- On the toolbar at the top of your back translation window, click on the arrow beside the check mark.
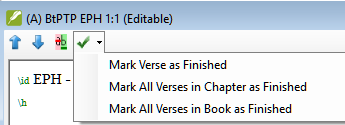
- Choose Mark All Verses in Chapter as Finished.
All the check boxes for the chapter are marked with green checks.
-
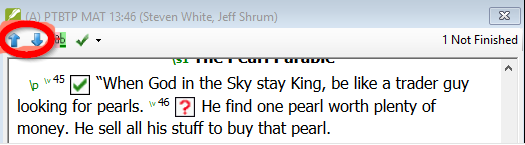
16.4: When a change is made to your project
Paratext will detect any saved changes to your text and will change the back translation checkbox to a red question mark  and add issues to the back translation status in the project plan.
- Click in a verse with the red question mark.
- Review and correct the back translation.
- Click the red question mark
It changes to a green check mark
16.4.1: View the differences for outdated verses
- Click on the
 icon on the toolbar to see the differences.
A comparison window is displayed.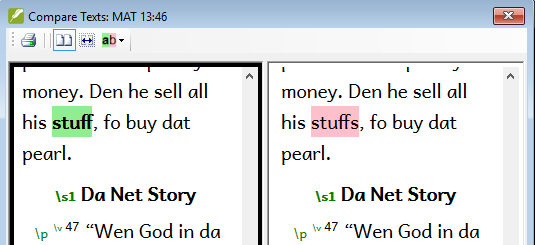
16.4.2: Move to the next differences
- Click on the up and down arrows to move to the previous or next differences.
-
16.5: Check your project plan
- Click the project plan icon

- Expand Stage 3, the back translation checks are at the end
The number of issues (if any) are displayed
-
16.6: Back translation verse check in project plan
- Click on the issues link
A result list window lists any errors. - And the back translation window is also displayed with the cursor in the first verse with problems.
- Correct the problem and move to the next outdated verse by clicking on the arrows on the toolbar.
-
16.7: Back translation status complete in project plan
- The back translation status is complete when there are no issues.
-
16.8: Learning task
The checkboxes in a back translation can have a number of different symbols.
Look in the Paratext help “What symbols can occur in status checkboxes in a back translation?” topic and match the following symbols and status:
| A | 
| 1 | Inconsistent verse number | |
| B | 
| 2 | No text/verse no. | |
| C | 
| 3 | Not finished | |
| D | 
| 4 | Finished | |
| E | 
| 5 | Out of date |
Answers: A3, B4, C5, D1, E2
17: BT2 – Interlinearize a project
Introduction
The previous module explained how to create a back translation that expresses what a reader understands when he reads or hears the text. There is another type of back translation that is sometimes used and that is a word-for-word style back translation. Some consultants may ask for this style of back translation. If you need to make one of these, you can use Paratext’s project Interlinearizer function.
Please note that in Paratext 9 you can only use the Interlinearizer on registered projects.
Where we are
You have typed, checked and revised your translation in Paratext and are now preparing for a consultant check by doing a word-for-word back translation. Before you can start your Administrator must have created a separate project for your word-for-word back translation. [This is separate from the readable back translation in the previous module.]
Why this is important
Your consultant needs to have a copy of your translation in a language they can understand. The back translation done in the previous module is very useful but there are times when a literal translation is more helpful.
What you will do
You will use the project interlinearizer to produce a word for word gloss of the text. Firstly, you will setup the interlinearizer, and then correct any errors. The computer’s initial guesses are often wrong but it learns as it goes and becomes quite accurate quickly. The idea is for the gloss to be correct even though the word order is not correct. When you are happy with the verse you can approve the glosses and move to the next verse with unapproved glosses.
-
17.1: Configure the project interlinearizer
- Click in your project
- ≡ Tab, under Tools > Open Project interlinearizer
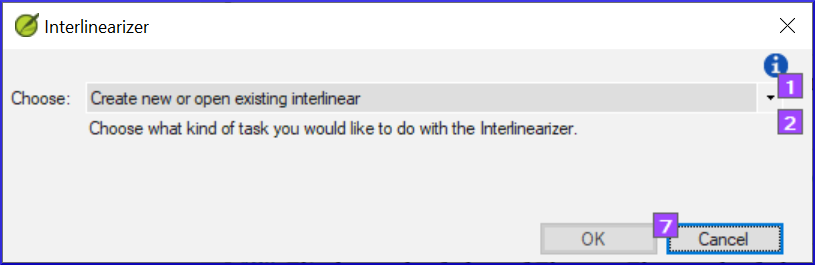
- Click to dropdown the list [1].
- Choose to create glosses based on a model text. This is usually your reference text or your free back translation project [2]
- Choose your model text [3].
- Click OK
-
17.2: Correct the interlinearized text
To correct glosses
- Click the incorrect gloss
A list is displayed. - Either click on the correct gloss in the list
or type the correct gloss in the textbox - Click Enter
-
17.3: Translate/gloss a phrase
- Click between two words
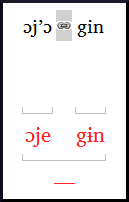
- Click the icon
 Link words
- Click the red line
- Type the gloss
-
17.4: Add extra words
- Click in the space between two glosses
- Type the extra word(s)
-
17.5: Specify the morphology – break a word into morphemes
- Click on the word in the translation line (top line)
- Click « Add word parse »
- Add spaces to separate the morphemes and add « `+` » prefixes and suffixes (see guide)
- Click OK
-
17.6: Approve and Export the text
When you approve and export the text any remaining red glosses will be approved.
- Click Approve glosses
- To continue, click Next Unapproved Verse
-
17.7: Help
For more help on using the Interlinearizer function see the following topics in the Paratext Help:
- Introduction to Project Interlinearizer
- How do I open the Project Interlinearizer?
- How do I generate an interlinear back translation?
- How do I create a back translation project with the Interlinearizer?
- How do I create a text revision/adaptation project with the Interlinearizer?
- What do the colours of glosses mean in the Interlinearizer?
18: CT – Compare Text
Introduction
In this module, you will learn how to save old versions of your text and review them later.
Where are we?
You have worked on your text and you have arrived at an important stage of your project.
Why is this important?
As you work on your translation, you are continually making changes. It is good to have a copy of the previous version of your text, for example the text as it was before you went to a consultant check. You can do this by marking a point in the history of your project. After marking a point in the history, you can compare the version at that point with the current version.
What will you do?
You will mark a point in the history of the project which you can go back to later and compare your work.
-
18.1: Mark Point in History
- Click in your project window to make it active (in Paratext).
- ≡ Tab under Project > Mark a point in project history
- Type a comment to describe the point.
- Click OK
-
18.2: Compare Two Versions
- ≡ Tab under Project > Compare Versions
- Click on the version dropdown list Current version
- Choose the desired point in the history
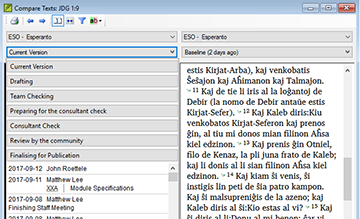
The screen will change and show the differences between both versions.
19: BC3 – Basic checks 3
Introduction
In this module you will learn how to run the remaining basic checks (references, quoted text, numbers, punctuation in pairs and quotations). As in the first two basic checks modules, it is easier to run the checks from the project plan. However, if you want to check more than one book then you need to run the checks from the checking menu.
Where we are
You have typed your translation into Paratext. Make sure you have done the checks described in modules BC1 and BC2 before continuing. And that either your administrator has done the setup for the checks or is available to do the setup with you.
Why this is important
Paratext has eleven basic checks. You have already seen the first six checks. This last set of checks helps you find errors related to material referred from other books. You want to be sure the references are accurate so that the reader can find those passages.
What you are going to do
As before, most of the checks require some setup to be done by your administrator. In this module you will:
- Confirm that the setup has been done
- Run the basic check
- Correct any errors.
-
19.1: Unmatched pairs of Punctuation
This check looks at punctuation that occurs in pairs (opening and closing) and lists errors where it is not matched by the other half of the pair. This may be deliberate but is more likely to be an error, e.g. ( ), [ ], etc.
19.1.1: Setup – inventory
- ≡ Tab, under Tools > Checking Inventories > Unmatched pairs of punctuation:
If the list is empty, then there are no errors. - If necessary, click Options... to add other pairs.
- Click OK.
19.1.2: Run the check
- ≡ Tab, under Tools > Run Basic Checks
- Check “Unmatched pairs of punctuation”
- Click OK
A list of errors is displayed. - Make any corrections as needed.
-
19.2: References
Before you can run the references check, your Administrator must define various settings.
- ≡ Tab, under Project > Scripture reference settings
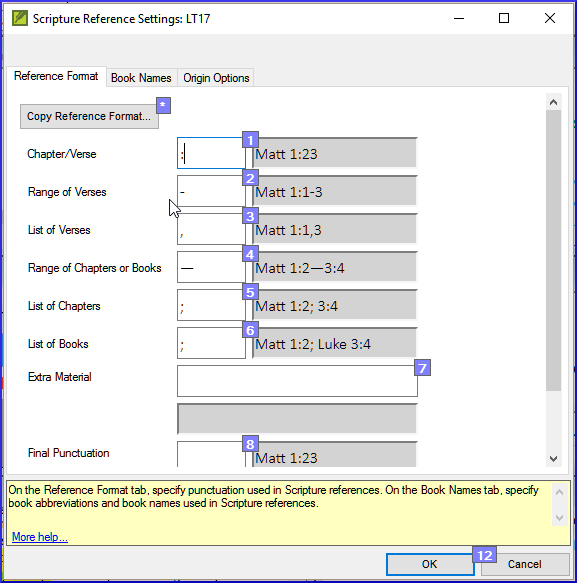
- For each setting, type the punctuation in the box
The sample will be updated on the right. - Click the Book names tab
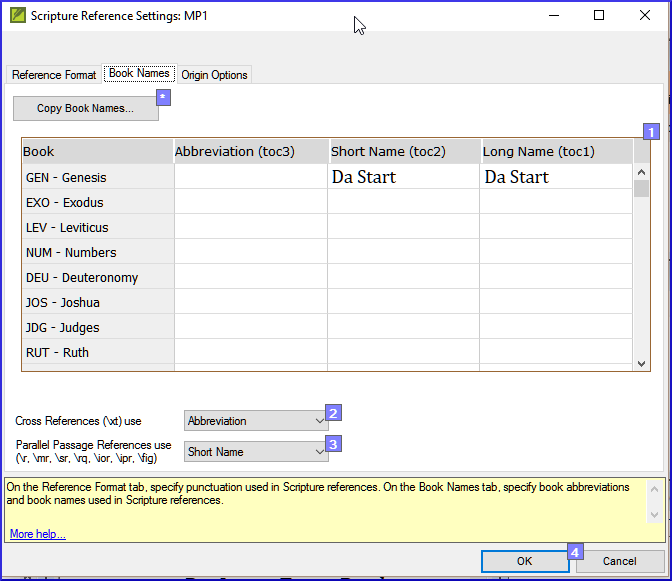
- Fill-in the three columns [1] with abbreviation, short name and long name.
- Choose Abbreviations [2] and [3] for both cross-references and references
- Click OK
- ≡ Tab, under Tools > Run Basic Checks
- Click « References »
- Click OK
- Correct any errors.
Paratext will inform you if there are any inconsistencies between these book name settings and the \toc lines and will allow you to check conflicts.
-
19.3: Numbers check
Before you can run the references check, your Administrator must define various number settings.
- ≡ Tab, under Project settings > Number settings
- Fill in the dialog box.
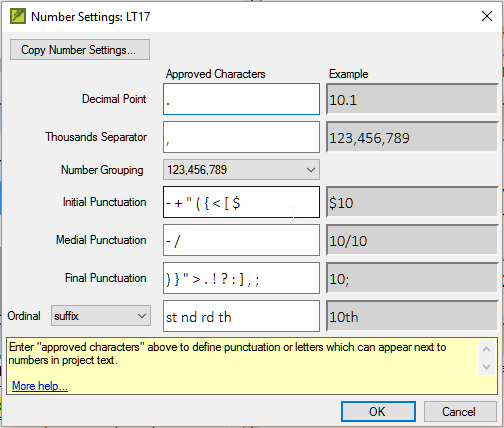
- Click OK
- ≡ Tab, under Tools > Run basic checks
- Click « Numbers»
- Click OK
-
19.4: Quotation rules
The quotations check is used to ensure you have been consistent in marking the direct speech correctly.
Before you can run the quotation check, your Administrator must define the rules for your quotations.
- ≡ Tab, under Project settings > Quotation rules
- Fill-in the quotation marks used for each level [1] [2] [3]
- Check Flag all quotes near other errors [8]
- Click OK.
-
19.5: Quotation check
- ≡ Tab, under Tools > Run basic checks
- Quotations
- Click OK.
A list of errors is displayed. It shows possible errors but includes four correct quotations before and after the possible error. - Double-click the first item which doesn’t start with ...
- Correct as necessary.
- Click Rerun button to confirm you have corrected the error.
-
19.6: Quoted text
The Quoted text check looks at text in footnotes or cross-references which has been marked with \qt \qt* markers. It checks that the quoted text matches the text in the verse.
- ≡ Tab, under Tools > Run basic checks
- Quoted text
- Click OK.
A list of errors is displayed. - Make corrections as needed.
Note: The text has to be exactly the same as in the text. That is, even additional punctuation cannot be in the \qt … \\qt* markers.
